
Single Tooth Implant Timeline: From Extraction to Final Crown in Miami, FL — Step‑by‑Step Guide and Expected Dates
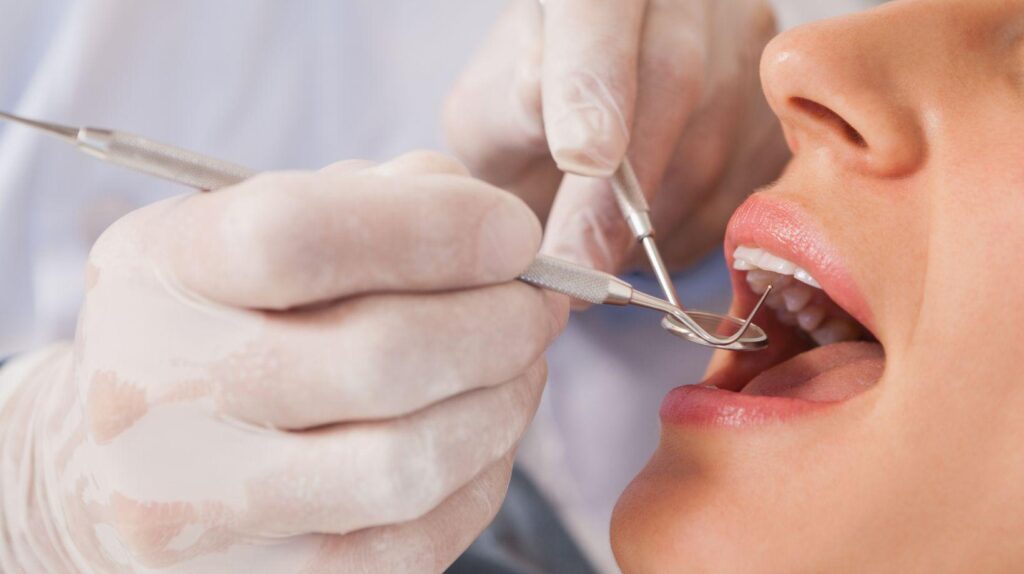
If you need a single tooth implant in Miami, this timeline breaks down what to expect from extraction to the final crown so you can plan appointments, healing time, and costs.
Most single-tooth implant cases take about 3–9 months from extraction to final crown, with shorter timelines when no bone grafting is required and longer ones when grafts or sinus lifts are needed.
You’ll see how assessment and planning shape your path, why osseointegration controls the schedule, and what each procedure—extraction, implant placement, abutment connection, and crown fabrication—will feel like and cost.
The article also compares Miami-specific factors like provider options and pricing so you can make an informed choice that fits your timeline and budget.
Assessment and Planning
You will undergo a focused evaluation to confirm implant candidacy, map bone and soft tissue, and set a clear timeline and cost estimate tailored to your case.
Initial Consultation in Miami, FL
At your first visit, the dentist reviews your medical history, current medications, and any prior dental treatment that affects healing, such as radiation or bisphosphonate use.
Expect a visual exam of the extraction site, adjacent teeth, bite relationship, and soft-tissue condition.
The clinician discusses smoking status, diabetes control, and other factors that change healing time.
You will get an initial estimate of steps needed—extraction, grafting, implant placement, or immediate provisional—and a ballpark timeline and fee range for Miami-area care.
Bring recent X-rays, a list of medications, and your insurance information.
The team answers questions about sedation options, anticipated appointments, and likely recovery so you leave with a practical plan.
Advanced Diagnostics and Imaging
Your provider typically orders a cone beam CT (CBCT) scan to measure bone height, width, and proximity to nerves or sinuses.
These 3D images let the team choose implant length, diameter, and ideal angulation with millimeter precision.
Digital intraoral scans or study models record tooth position and occlusion for prosthetic planning.
If bone grafting is possible, the scan helps decide graft volume and the need for staged versus simultaneous procedures.
The diagnostic phase also includes periodontal charting and photos.
All data combine into a surgical guide or virtual plan that reduces surprises during implant placement.
Personalized Treatment Plans
Your plan lists each step, timelines for healing, and contingency options if grafting or sinus lift becomes necessary.
It specifies implant brand, size, proposed abutment type, and whether a temporary crown will be placed immediately or after osseointegration.
The plan outlines risks, expected healing intervals (for example, 3–6 months for bone integration), and follow-up visit schedule.
It also presents payment options, insurance codes, and referrals for specialists if needed.
You receive written consent forms and pre-operative instructions tailored to your health status.
This gives you clear expectations for appointment count, recovery milestones, and final restoration delivery.
Tooth Extraction Procedures
You will learn how dentists decide between saving or removing a tooth, and what to expect during recovery and care to preserve bone and soft tissue for a future implant.
Evaluating Tooth Removal Options
Your dentist will assess the tooth with a clinical exam and a CBCT or periapical X-ray to check root shape, surrounding bone, and proximity to nerves or the sinus.
If the tooth is restorable, options include root canal therapy and a crown; if not, extraction becomes the recommended route.
Factors that push toward extraction include vertical root fracture, advanced periodontal bone loss, non-restorable caries, or failed endodontic treatment.
Your clinician will discuss timing: immediate extraction with socket preservation, delayed extraction before implant placement, or atraumatic extraction to preserve bone.
Expect a discussion of bone grafting when the socket shows defects.
Your dentist may offer socket grafting at time of extraction to reduce ridge resorption and simplify later implant placement.
Ask about anesthesia choices, sedation options in Miami clinics, and an estimate of healing time based on your specific exam.
Managing Healing After Extraction
After extraction, control bleeding with firm pressure and follow a medication plan for pain and, if prescribed, antibiotics.
You should avoid spitting, smoking, and using straws for at least 48–72 hours to protect the clot and reduce dry socket risk.
Watch for swelling and mild bleeding for 2–3 days; apply cold packs for 24 hours then switch to warm compresses if needed.
Maintain soft foods and good oral hygiene—carefully brush adjacent teeth and rinse gently with saline or prescribed mouthwash after 24 hours.
If socket grafting was performed, expect sutures and follow-up at 7–14 days to check healing.
Bone remodeling typically continues for months; your clinician will time implant placement based on socket integrity, graft incorporation, and your overall health to optimize osseointegration later.
Osseointegration and Bone Health
Osseointegration is the biological fusion between titanium and your jawbone; healthy bone volume and density determine how quickly and securely that fusion occurs.
Bone grafting, infection control, and systemic health (like diabetes or smoking) are the main factors that change your timeline and treatment steps.
Bone Grafting Considerations
If your jaw lacks sufficient width or height, your dentist will recommend grafting to create a stable foundation for the implant.
Graft materials include your own bone (autograft), donor bone (allograft), bovine-derived bone (xenograft), or synthetic bone substitute; your clinician will choose based on defect size, cost, and healing expectations.
Grafting can be simultaneous with implant placement for small defects, or staged when bone loss is significant; staged grafts typically add 3–6 months before implant placement.
Expect local anesthesia, sutures, and a short antibiotic/antiseptic regimen.
Smoking, uncontrolled diabetes, and poor oral hygiene raise the risk of graft failure and delay subsequent steps.
Timeline for Jawbone Healing
After implant placement, primary soft-tissue healing usually completes in 1–2 weeks, but bone remodeling and osseointegration take longer.
Typical osseointegration spans 3–6 months in the lower jaw and 4–9 months in the upper jaw, with variability from bone quality and whether grafting was performed.
Clinicians monitor stability with clinical exams and, when needed, radiographs at intervals (commonly 2–3 months and again before abutment or crown).
If you feel persistent pain, mobility, or swelling beyond expected healing windows, contact your implant team immediately to evaluate possible infection or failure.
Implant Placement Process
You will learn how the implant is placed, what anesthesia or sedation options you can expect, and how your dentist protects appearance and function while the implant heals.
Surgical Steps in Miami Dental Clinics
Most clinics start with a CBCT scan and digital plan to confirm implant size and position relative to adjacent teeth and the sinus.
Your surgeon makes a small incision in the gum, exposes bone, then drills progressively larger osteotomy sites using irrigation to avoid overheating the bone.
The implant (titanium or titanium‑alloy) is threaded or tapped into the prepared site to a planned depth and torque value; clinicians typically record insertion torque and may take an immediate periapical or CBCT image to verify placement.
If bone grafting or ridge augmentation is needed, the clinician places graft material and a membrane before suturing.
Sutures are usually resorbable, and you’ll receive written postoperative care instructions and a follow‑up visit scheduled within 1–2 weeks.
Use of Local Anesthesia and Sedation
You will receive local anesthesia (lidocaine or similar) to numb the surgical site for all routine implant placements.
Clinicians commonly add a vasoconstrictor to prolong anesthesia and control bleeding.
If you feel anxious or the case is complex, Miami clinics offer conscious sedation options: oral sedatives (triazolam), nitrous oxide, or IV sedation administered by a trained provider.
Your medical history and any medications determine the safest choice.
Sedation lowers awareness but usually preserves protective reflexes; you must arrange a ride home and follow fasting instructions if using moderate or deep sedation.
Temporary Solutions During Healing
After implant insertion, you may leave with a temporary restoration to preserve appearance and function.
Options include a removable flipper, a bonded provisional resin tooth, or a screw‑retained provisional on a healing abutment when primary stability allows.
Your dentist balances loading risk and esthetics—if you have high bite forces or thin bone, they may prefer a non‑functional temporary (no opposing contact).
You’ll receive instructions on eating, oral hygiene around the temporary, and when to return for the abutment and final crown appointment.
Recovery and Aftercare
Expect soft-tissue closure within a week, gradually reduced swelling, and deeper bone healing over months.
Follow specific home-care steps and attend scheduled follow-ups to protect the implant and detect complications early.
Post-Implant Healing Stages
Day 0–7: You will have bleeding and swelling that peak around 48–72 hours.
Use ice for 10–15 minutes on/off during the first 24 hours, take prescribed pain meds or acetaminophen/ibuprofen as directed, and avoid spitting or using a straw to protect the clot.
Weeks 1–4: The gum tissue will mature and the sutures (if not dissolvable) may be removed at 7–14 days.
Eat soft foods, keep the surgical site clean with gentle rinses (0.12% chlorhexidine if recommended) and avoid hard, crunchy, or chewy foods on the implant side.
Months 2–6 (osseointegration): Bone bonds to the implant; you may have intermittent sensitivity but not significant pain.
Avoid heavy biting forces—no chewing on the implant tooth until your dentist confirms stability.
Attend the 2–3 month check and the final osseointegration assessment before abutment or crown steps.
Minimizing Discomfort and Risks
Medication and immediate care: Take antibiotics only if prescribed.
Use scheduled analgesics the first 48–72 hours to control pain; start anti-inflammatories before swelling peaks when advised by your clinician.
Apply cold packs first day and warm compresses after 48 hours if swelling persists.
Oral hygiene and diet: Maintain gentle cleaning—brush adjacent teeth normally but use a soft toothbrush and avoid direct trauma to the site.
Rinse with recommended antiseptic rinses beginning 24 hours post-op; do not use aggressive mouthwashes or hydrogen peroxide unless instructed.
Stick to a soft-food diet (yogurt, mashed potatoes, smoothies without seeds) for 7–14 days.
When to call your dentist: Contact your provider if you have uncontrolled bleeding, fever over 100.4°F (38°C), increasing pain after 72 hours, pus at the site, or sudden loosening of the implant or adjacent teeth.
Early intervention reduces risk of infection and implant failure.
Abutment Attachment Procedures
Abutment attachment connects the implanted titanium post to the visible crown and sets the final tooth height, angulation, and soft-tissue contour.
The two subsections below explain when the abutment is placed and which abutment materials you’ll encounter.
Timing for Abutment Placement
You typically receive an abutment after the implant has osseointegrated — commonly 3 to 6 months after implant placement in standard cases.
If your implant achieved good primary stability and your clinician used a one-stage protocol, the abutment may be attached at the time of surgery or during a short follow-up visit within a few weeks.
If you had a bone graft or sinus lift, expect a longer wait: grafted sites often need an additional 3 to 6 months before safe abutment placement.
Your dentist assesses stability clinically and with radiographs; they will torque the abutment to a specified value (usually 20–35 Ncm) to confirm secure connection.
Temporary abutments can be used to shape gums before the final crown is made.
Materials Used for Abutments
Abutments come in three common materials: titanium, zirconia, and hybrid (titanium base with ceramic overlay).
Titanium abutments are strong and biocompatible, and they remain the standard for posterior teeth where strength matters most.
Zirconia abutments provide superior esthetics for front teeth because they resist showing a dark shadow through thin gums.
Hybrid abutments combine a titanium connection for strength with a ceramic body for appearance; you’ll often see these when lab customization and implant angulation correction are needed.
Your clinician selects the material based on location, gum thickness, bite forces, and esthetic goals.
They will also decide between stock and custom abutments; custom abutments give better emergence profile and fit but cost more and require lab work.
Custom Crown Fabrication
This stage shapes the final look, fit, and function of your tooth.
It combines precise digital records, accurate shade selection, and laboratory craftsmanship to produce a crown that matches your bite and smile.
Digital Impressions and Shade Matching
You’ll typically receive a digital intraoral scan instead of traditional putty impressions.
Scans capture the implant position, adjacent teeth, and occlusion in high resolution, which reduces remakes and speeds fabrication.
Shade matching uses a combination of spectrophotometers and visual checks under standardized lighting.
Technicians note enamel translucency, surface texture, and the color gradient from gum line to biting edge.
You may be photographed with shade tabs for reference.
Clinics in Miami often use these steps to account for local lighting and patient skin tone, which affects perceived color.
If you want an exact match, request a try-in of a temporary crown or a mock-up so adjustments can be made before final milling.
Laboratory Design Techniques
After data capture, the lab designs the crown using CAD software that aligns the restoration to your digital model and occlusal scheme. They set emergence profile and contact points to protect papillae and adjacent teeth.
Materials are chosen based on location and esthetic need: zirconia for strength in posterior areas; layered ceramic for front teeth where translucency matters. Mills produce a full-contour prosthesis.
Technicians add characterizing stains and glazes by hand when required. Quality checks include fit verification on the model and margin accuracy within 50–100 microns.
Articulation testing is performed in a digital simulator. Labs may send photos of the finished crown for your dentist to approve before delivery.
Final Restoration Delivery
You will receive the permanent crown once your implant and surrounding gum tissue are stable and your dentist confirms proper fit and bite. The appointment focuses on precise seating, minor adjustments, and verification of function and aesthetics.
Fitting and Adjusting the Crown
Your dentist first removes the temporary restoration and inspects the implant-abutment connection for cleanliness and torque. The permanent crown is placed on the abutment and checked for passive seating.
Your clinician will use articulating paper to mark high spots. Expect small adjustments to the crown margins and occlusal contacts.
The clinician may polish the crown or trim excess cement if a cemented crown is used. For screw-retained crowns, screw access and torque are verified.
Shade match is confirmed under the operatory light and against adjacent teeth. If needed, the crown may be removed, sent back to the lab for refinements, and reinserted at a follow-up visit.
Ensuring Bite Alignment
You will bite and grind lightly while the dentist observes contact patterns with articulating paper. Incremental adjustments are made to achieve even contact in centric occlusion and smooth lateral excursions.
Your provider also assesses chewing efficiency and comfort while you simulate normal eating motions. If you have bruxism or an uneven bite, your dentist may recommend a nightguard or occlusal equilibration to protect the implant and opposing teeth.
Final verification includes re-checking contacts after a few days to ensure no new high spots appear as the crown settles.
Long-Term Care in Miami, FL
Maintain daily cleaning, protect the implant from excessive forces, and keep regular professional checkups to monitor bone and soft tissue health. Local factors like humidity, dietary habits, and access to specialists in Miami can influence how you care for your implant.
Oral Hygiene Recommendations
Brush twice daily with a soft-bristled toothbrush and low-abrasive fluoride toothpaste to avoid scratching the implant crown or surrounding restorations. Use gentle circular strokes along the gumline and around the implant abutment for at least two minutes.
Floss once daily using implant-specific floss, a floss threader, or a water flosser to remove plaque under the crown margin and between teeth. Pay special attention to the contact points next to the implant to prevent peri-implantitis.
Rinse with an alcohol-free antimicrobial mouthwash if your dentist recommends it. This reduces bacterial load without drying oral tissues.
Avoid hard, sticky, or very chewy foods for the first few weeks after crown placement. Minimize habits like ice-chewing long-term.
If you smoke, pursue cessation support. Smoking increases implant failure risk and slows healing.
Local Miami cessation programs and nicotine-replacement options can help.
Ongoing Dental Visits
Schedule a maintenance visit every 3–6 months based on your dentist’s risk assessment. High-risk patients—those with a history of periodontal disease, diabetes, or heavy smoking—usually need three-month recalls, while low-risk patients may be seen every six months.
During visits, your dentist will check implant stability, probe peri-implant sulcus depths, and assess soft tissue health. Periodic radiographs (typically annually or as indicated) are taken to monitor bone levels around the implant.
Professional cleaning will use instruments safe for implants, such as plastic or titanium-coated scalers, to avoid scratching the implant surface. Your dentist or hygienist will also review your home-care technique and make adjustments to tools or frequency as needed.
Understanding Costs and Financing Options
Expect a single tooth implant in Miami to commonly fall between about $3,000 and $7,000, depending on implant type, imaging, abutment, and crown choices. Additional procedures like extractions, bone grafts, or sinus lifts raise the total and extend the timeline.
Insurance may cover parts of the process, such as extractions or restorative crowns, but often excludes the implant fixture itself. Verify benefits, annual maximums, and any required preauthorizations before scheduling to avoid surprises.
Consider financing to spread out payments. Options include dental-specific credit plans, medical credit cards, in-office payment plans, and third-party lenders.
Compare interest rates, repayment terms, and penalties for missed payments. Request an itemized estimate that separates consultation, imaging, surgical placement, grafting, abutment, and crown.
An itemized quote helps you compare clinics and identify which line items are negotiable or eligible for partial insurance coverage.
Common cost-saving approaches:
- Ask about bundled pricing for implant + crown.
- See if the clinic offers discounts for paying upfront.
- Check if flexible spending accounts (FSA) or health savings accounts (HSA) can be used.
Keep documentation of all quotes and insurance communications. That record helps when contesting denials or seeking alternate payment arrangements.
Comparing Miami to Other Implant Destinations
Miami often offers a wider range of specialists, including oral surgeons and prosthodontists. This can speed coordination of care for complex single-tooth cases.
You may find faster access to consults and advanced imaging than in smaller markets. Costs in Miami tend to be higher than in many U.S. cities but lower than some major metropolitan areas.
Pricing varies by clinic, implant brand, and whether you need grafting. If budget matters, compare itemized quotes for implant components, lab fees, and follow-up visits.
Travel and convenience matter when multiple visits are required for osseointegration and crown placement. Plan for 3–9 months of total treatment time.
If you live far away, choose a provider who coordinates local follow-up or offers remote monitoring. Quality indicators to compare: clinician credentials, digital planning use, on-site lab capabilities, and published outcomes.
Ask about sequencing options (immediate placement vs. delayed) and how those choices affect your timeline.
Practical checklist for comparing locations:
- Credentials and specialist availability
- Detailed cost breakdown
- Average local timeline for extraction-to-crown
- Aftercare and emergency access
About The Author

 Win Warmth: Helpinus Medical Heating Tube Socks Giveaway — How To Enter & Why They Work (2026)
  5G Headache Remedies That Work: Practical Relief And When To Seek Help (2026)
  Stone Age Calisthenics: Helpinus Recap — What Worked, What Didn’t (2026)
  Thynaril Vorkyn: What It Is, How It Works, and What To Know In 2026
  Jay Stallings’ Health Guide: Practical, Evidence‑Backed Steps To Better Health With Helpinus (2026)
  Helpinus: Jay Stallings’ Practical Health Guides For Everyday Wellness (2026 Update)