
Temporary vs. Permanent Crowns: What Happens Between Appointments — Care, Risks, and What to Expect
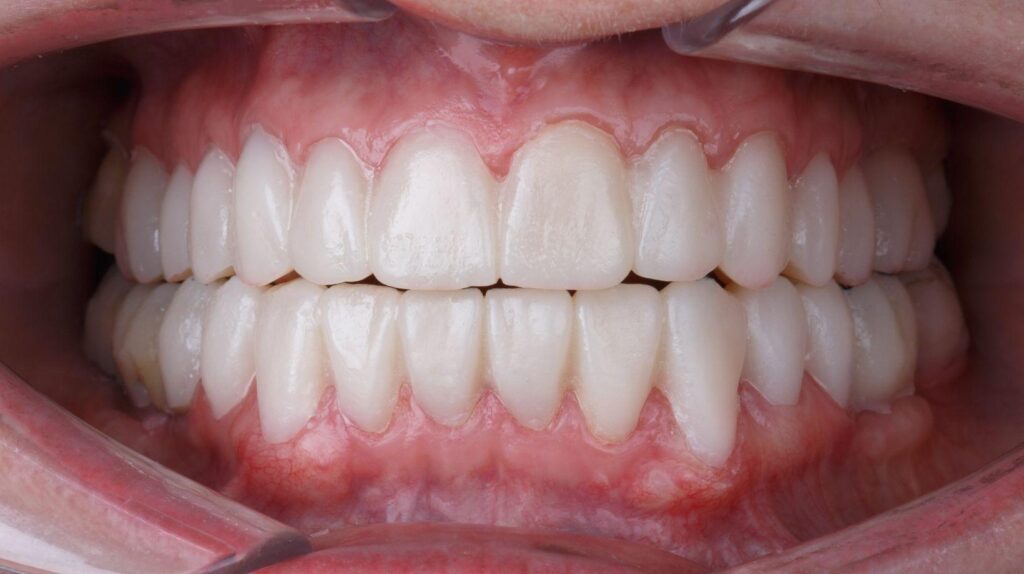
Getting a crown means a short journey, not a single appointment. You’ll leave the dental chair with a temporary crown that protects your prepared tooth, lets you chew and speak, and gives both you and your dentist a preview of the final shape.
Along the way, you’ll learn why temporaries feel and look different, what to avoid eating, and how your dentist checks fit and appearance before the permanent crown arrives. If you’re getting dental crowns in Blaine, WA, expect step-by-step adjustments, common issues like loosening or sensitivity, and clear guidelines to keep everything on track for a comfortable, long-lasting final result.
Purpose of Dental Crowns
Dental crowns restore strength, protect vulnerable tooth structure, and improve the appearance of teeth affected by decay, fracture, wear, or large restorations. They replace missing outer tooth material, cover weakened roots after root canal treatment, and match shape and color to nearby teeth.
Restoring Tooth Structure
When a tooth has large decay or an extensive filling, you lose substantial enamel and dentin that normally handle chewing forces. A crown rebuilds that lost outer structure by encasing the prepared tooth, restoring proper height, contour, and contact with adjacent teeth.
You should expect your dentist to remove weakened tissue, shape the remaining tooth, and take impressions or digital scans so the crown recreates the original chewing surface and bite. This reconstruction prevents abnormal wear on opposing teeth and helps maintain proper jaw alignment.
A well-fitted crown also re-establishes the contact point between teeth, which reduces food trapping and helps preserve gum health. Materials like porcelain-fused-to-metal, zirconia, or full ceramic provide different balances of strength and appearance for your specific need.
Protecting Damaged Teeth
Crowns act as a protective cap that distributes biting forces away from fractures, cracks, or thin remaining tooth walls. After root canal therapy, the inner tooth can become brittle; placing a crown lowers the risk of catastrophic fracture and reduces sensitivity.
If a tooth has a vertical crack or large cuspal fracture, a crown holds the pieces together and prevents further propagation of the crack. Your dentist may recommend a crown immediately when structural integrity is compromised or after monitoring minor cracks.
Temporary crowns provide short-term protection between appointments, but the permanent crown uses durable materials and precise fit to restore long-term function and reduce the chance of future emergency visits or re-treatment.
Enhancing Aesthetics
Crowns correct shape, size, and color problems you might not fix with fillings alone. If your tooth is discolored from trauma, root canal treatment, or intrinsic staining, a porcelain or ceramic crown can match adjacent teeth for a natural appearance.
You can choose shade, translucency, and surface texture so the restoration blends with your smile. Crowns also improve alignment and fill gaps when combined with minor reshaping; your dentist will evaluate whether a crown or an alternative (veneers, bonding) best meets your cosmetic goals.
A properly designed crown maintains gum contours and supports soft tissue, so the finished result looks seamless and stable over time.
Differences Between Temporary and Permanent Crowns
Temporary and permanent crowns differ in materials, expected lifespan, fit precision, and how they feel in your mouth. These differences affect how you eat, care for the crown, and what to expect at the final appointment.
Materials Used
Temporary crowns are usually made from acrylic resin or stainless steel when strength is essential for molars. Acrylic or composite temporaries get fabricated chairside or in a lab and are chosen for speed and low cost.
They resist chewing forces reasonably well but can stain and wear faster than permanent options. Permanent crowns come in several materials: porcelain-fused-to-metal (PFM), all-ceramic (zirconia, lithium disilicate), and full metal (gold or high-noble alloys).
Each material balances strength, esthetics, and tooth preservation differently. For front teeth you’ll often get all-ceramic for natural color-matching; for back teeth, zirconia or metal may be chosen for durability.
Longevity and Durability
Temporary crowns are designed for short-term use—typically days to a few weeks, sometimes a few months if delays occur. Expect higher risk of fracture, wear, and loss of fit over time.
They serve to protect the prepared tooth and maintain space, not to withstand long-term occlusal stress. Permanent crowns are engineered to last years.
Typical lifespans range from 5–15+ years depending on material, oral hygiene, bite forces, and habits like grinding. Metal and zirconia crowns show higher longevity under heavy chewing forces.
Proper cementation and good hygiene reduce the chance of recurrent decay and extend the crown’s lifespan.
Comfort and Fit
Temporary crowns are trimmed quickly and cemented with temporary cement; they may feel bulkier or slightly loose and can alter your bite briefly. You might notice sensitivity, minor sharp edges, or a rougher surface.
Avoid sticky or hard foods to prevent dislodgement. Permanent crowns receive custom shaping, glazing, and stronger cementation for precise occlusion and smoother surfaces.
You should notice reduced sensitivity and a more natural bite after final cementation. If the fit still feels off, your dentist can adjust contacts and bite to eliminate high spots and improve comfort.
Why Temporary Crowns Are Necessary
Temporary crowns protect the prepared tooth from damage and sensitivity, and they keep surrounding teeth from shifting while the permanent crown is made. You get a functional, esthetic placeholder that preserves space, bite, and gum health during the waiting period.
Protecting the Prepared Tooth
After your dentist trims the tooth to make room for a crown, the exposed dentin and any remaining restoration become sensitive and vulnerable. A temporary crown covers the tooth, reducing temperature and pressure sensitivity and preventing food and bacteria from entering the prep site.
Temporaries also protect margins and the prepared shape. Without a cover, chewing forces or debris can chip or distort the prepared walls, which would compromise the fit of the final crown.
Temporaries are typically cemented with a weaker, removable cement so your dentist can remove them without damaging the preparation. If a temporary falls off, you should keep it clean and contact your dentist.
Replacing or recementing the temporary quickly prevents sensitivity, movement, and potential infection.
Maintaining Tooth Alignment
Teeth naturally shift when neighboring contacts are removed or space changes. A temporary crown preserves the original contact points and occlusion so your permanent crown fits precisely.
This prevents drifting of adjacent teeth and tipping of opposing teeth into the prepared space. Maintaining proper alignment also protects your bite.
If contacts or occlusion change, your final crown may cause high spots, uneven wear, or jaw discomfort. The temporary lets your dentist evaluate and adjust bite relationships before fabricating the permanent crown.
Your temporary also helps support soft tissue contours. Properly contoured temporaries guide the gum tissue to heal in a shape that allows the laboratory crown to match surrounding teeth for a natural margin and esthetic result.
Step-by-Step Process After Tooth Preparation
You will have a shaped tooth ready for a crown and a temporary in place. The next steps capture the exact tooth geometry and record how your teeth meet, then move that information to the lab or digital mill so the final crown fits, functions, and matches your bite.
Impression Taking and Bite Registration
Your dentist will capture the prepared tooth and adjacent teeth using either a physical impression or a digital scan. For a traditional impression, the clinician fills a tray with alginate or PVS material, seats it over your teeth, and holds it until it sets—this usually takes 2–5 minutes.
Expect mild pressure but no pain; gagging can be managed by breathing techniques or a smaller tray. If your office uses a digital scanner, they sweep a wand across the tooth surfaces to create a high-resolution 3D image.
Digital scans often shorten appointment time and reduce the chance of voids or distortions. After the arch is recorded, your dentist records your bite with a bite registration material or digital occlusal scan to ensure the crown aligns with opposing teeth and your jaw position.
The dentist also notes shade, translucency, and any special esthetic requests. Photos and written instructions accompany the impression or scan so the lab or milling unit can reproduce color and shape accurately.
Fabrication of the Crown
If the practice sends work to a dental lab, the lab technician pours the physical impression into stone or imports the digital file, then designs the crown on a CAD system. The lab fabricates the crown from chosen materials—porcelain-fused-to-metal, full ceramic, or zirconia—using layering, sintering, and polishing.
This process often takes 1–2 weeks depending on lab workload and whether additional customization (staining, glazing) is requested. For same-day crowns, your dentist uses an in-office CAD/CAM mill.
The scanned file is designed chairside, milled from a ceramic block, then sintered and glazed while you wait. Expect a longer single appointment but no temporary crown.
Before final delivery, the crown undergoes a quality check: fit on a model or digital verification, occlusal adjustments, and color match against photos. Your dentist will call or schedule the cementation visit once the crown meets these criteria.
Care Guidelines for Temporary Crowns
Temporary crowns protect the prepared tooth, keep neighboring teeth from shifting, and require careful handling to avoid dislodgement or damage.
Cleaning and Oral Hygiene
Keep the temporary crown and surrounding gum tissue clean to prevent decay and irritation. Brush twice daily with a soft-bristled toothbrush and fluoride toothpaste, using gentle circular motions over the crown margin.
Floss once a day, but slide the floss out from the side of the crown rather than lifting up through the contact; this prevents pulling the crown off. Rinse with an alcohol-free antiseptic mouthwash if recommended by your dentist, especially after meals.
If food gets trapped, use a water flosser or an interdental brush to dislodge debris without stressing the crown. Contact your dentist promptly if you notice persistent sensitivity, a raised bite, looseness, or gum swelling.
Dietary Restrictions
Avoid hard, sticky, or chewy foods that can fracture or dislodge the temporary crown. Do not chew ice, hard candy, nuts, or raw carrots on the crown side.
Skip gum, caramels, toffee, and other tacky sweets that can pull the crown off. Cut food into small pieces and chew on the opposite side when possible.
If the temporary crown feels uneven when you bite, call your dentist before eating crunchy foods. If the crown becomes loose or falls out, save it and bring it to your appointment—your dentist may re-cement it or replace it.
Common Issues Before the Final Appointment
You may feel tooth sensitivity, soreness, or notice your temporary crown feel loose or come off. These problems are common and usually manageable with simple care or a quick dental visit.
Sensitivity or Discomfort
You can expect some sensitivity to cold, hot, or pressure after the tooth is prepared and the temporary crown is placed. Nerve irritation from the dental work or cement settling can cause sharp sensitivity with cold drinks or dull ache when biting.
Use a soft-bristled toothbrush and avoid hard, sticky, or very hot foods to limit irritation. Over-the-counter pain relievers like ibuprofen reduce inflammation; follow dosing instructions on the label.
If sensitivity worsens, lasts more than a few days, produces severe throbbing, or is accompanied by swelling or fever, call your dentist promptly—these signs can indicate infection or the need for a protective medication or adjustment.
Temporary Crown Dislodgement
Temporary crowns can loosen or fall off from chewing sticky foods, bruxism (teeth grinding), or weak temporary cement. If the crown feels loose, avoid chewing on that side and keep the crown if it comes off.
You can re-seat a lost temporary with a small dab of dental cement or temporary adhesive from a pharmacy, following package directions. Do not use household glues.
Contact your dentist the same day if you cannot re-seat it, if the underlying tooth is painful, or if sharp edges expose soft tissue—your dentist will re-cement or replace the temporary to protect the tooth and ensure proper fit for the final crown.
Receiving the Permanent Crown
You will have the temporary crown removed, the fit and color of the new crown verified, and the final crown bonded or cemented in place. The dentist confirms bite, contacts with adjacent teeth, and aesthetics before you leave.
Final Placement Procedures
The dentist first numbs the area if needed, then removes the temporary crown and cleans the prepared tooth. They inspect the tooth for decay or debris and may take a quick X-ray to verify the fit and margin integrity.
Your permanent crown is tried on to check margins, occlusion, and shade match under natural light. If the fit is correct, the clinician applies dental cement or adhesive and seats the crown firmly.
Excess cement is removed, and you will bite down to ensure proper seating. If the crown is made of certain ceramics, the dentist may use a resin cement that requires a specific curing light.
If a metal-based crown is used, traditional glass ionomer cement may be chosen for durability. The clinic will give you immediate instructions about avoiding sticky foods for a short period.
Adjustment and Polishing
After cementation the clinician checks your bite with articulating paper and makes small adjustments with a dental handpiece. These adjustments ensure you don’t have high spots that cause discomfort or alter your chewing pattern.
The dentist polishes the crown to smooth margins and restore a natural sheen that resists plaque accumulation. They also check contacts with neighboring teeth using floss to confirm proper interdental spacing and to make sure floss passes without shredding.
If you notice persistent sensitivity, sharp edges, or a changed bite after you leave, contact the office promptly. Most minor issues can be corrected quickly during a short return visit.
Expected Outcomes After Crown Placement
You can expect improved chewing, restored tooth shape, and protection against further damage. Proper care and periodic checks will keep the crown functioning and looking like a natural tooth.
Restored Tooth Function
After the permanent crown is cemented, you should notice immediate improvement in biting and chewing on that side. The crown restores the tooth’s original height and contact with adjacent teeth.
This helps distribute chewing forces evenly and reduces stress on nearby teeth. Some sensitivity to hot, cold, or pressure can occur for a few days as the surrounding tissues settle.
If sensitivity persists beyond two weeks or you experience sharp pain when biting, contact your dentist. This can indicate a high spot on the crown, an occlusion issue, or underlying pulp irritation.
Avoid chewing very hard or sticky foods for 24–48 hours to allow the cement to fully set. You should be able to speak normally.
If the crown feels bulky or your bite feels off, your dentist can adjust the fit quickly.
Long-Term Maintenance
Maintain the crown the same way you care for natural teeth: brush twice daily with fluoride toothpaste and floss once daily. Make sure to clean the crown margins thoroughly.
Use interdental brushes or floss threaders if your crown borders a bridge or implant.
Watch for signs of problems such as recurrent decay at the crown margin, gum inflammation, loosening, or visible cracks.
Schedule regular dental exams and professional cleanings every 6 months, or as your dentist recommends.
If the crown becomes loose or falls off, keep it and contact your dentist immediately.
Temporary recementation can protect the tooth until a permanent solution is applied.
About The Author

 Win Warmth: Helpinus Medical Heating Tube Socks Giveaway — How To Enter & Why They Work (2026)
  5G Headache Remedies That Work: Practical Relief And When To Seek Help (2026)
  Stone Age Calisthenics: Helpinus Recap — What Worked, What Didn’t (2026)
  Thynaril Vorkyn: What It Is, How It Works, and What To Know In 2026
  Jay Stallings’ Health Guide: Practical, Evidence‑Backed Steps To Better Health With Helpinus (2026)
  Helpinus: Jay Stallings’ Practical Health Guides For Everyday Wellness (2026 Update)